

In this guide, we will upload a single file to the database using GraphQL, NodeJS, Express, FileSystem, and MongoDB. So, let's start by setting up our project environment.
npm init -y
In this tutorial, I will use npm, you can use yarn if you want to. It's really up to you, anyone is fine.
Next, structure your project as follows:
├── node_modules
├── graphql
|  ├── resolvers
|  |  └── index.js
|  └── typeDefs.js
├── models
|  └── File.js
├── index.js
└── package.json
install other packages:
npm i graphql mongoose express path body-parser
After installing the necessary packages, the package.json file looks like:
{
  "name": " ",
  "main": "index.js",
  "scripts": {
    "start": "node ./src/index.js",
  },
  "author": "",
  "license": "ISC",
  "homepage": "",
  "dependencies": {
    "apollo-server": "^2.11.0",
    "body-parser": "^1.18.3",
    "express": "^4.16.3",
    "mongoose": "^5.9.7",
    "path": "^0.12.7",
  }
}
Then, create your type definition for file upload in the typeDef.js file. You can check GraphQL docs to learn more about type definition.
import { gql } from 'apollo-server';

const typeDefs = gql`
type File {
    id: ID!
    filename: String!
    mimetype: String!
    path: String!
  }

type Mutation {
uploadFile(file: Upload!): File
}
`;

export default typeDefs;
You might be wondering where the Upload! type comes from, its actually from graphql, its in-built. Then, you can go ahead to create a model for the image in the File.js file inside the model folder.
import { model, Schema } from 'mongoose';

const fileSchema = new Schema({
  filename: String,
  mimetype: String,
  path: String,
});

const File = model('File', fileSchema);

export default File;
Then, we can open the index.js file inside the resolver folder and create the logic we will be using to interact with the database.
import { createWriteStream } from 'fs';
import File from '../../models/File';

const storeUpload = async ({ stream, filename, mimetype }) => {
  const path = `${filename}`;
  return new Promise((resolve, reject) =>
    stream
      .pipe(createWriteStream(path))
      .on('finish', () => resolve({ path, filename, mimetype }))
      .on('error', reject)
  );
};
const processUpload = async upload => {
  const { createReadStream, filename, mimetype } = await upload;
  const stream = createReadStream();
  const file = await storeUpload({ stream, filename, mimetype });
  return file;
};

const resolvers = {
  Mutation: {
 async uploadFile(_, { file }, context) {
      try {
        const upload = await processUpload(file);
        const { path, filename, mimetype } = upload;
        const newFile = new File({
          path,
          filename,
          mimetype,
        });
        const res = await newFile.save();
        return {
          ...res._doc,
        };
      } catch (err) {
        throw new Error('profile photo upload failed');
      }
    },
  }
};

export default resolvers;
You will notice that there are two functions for processing the file using fs. Note: you can decide to use any storage you want e.g cloudinary, AWS s3, etc. I decided to use fs module because I don't want to have separate storage for users' files.
After this, we can make a request via CURL or postman to test the code. using CURL:
curl localhost:4000/graphql \
  -F operations='{ "query": "mutation ($file: Upload) { uploadFile((file: $file) }", "variables": { "file": null } }' \
  -F map='{ "0": ["variables.file"] }' \
  -F 0=@package.json
using Postman:
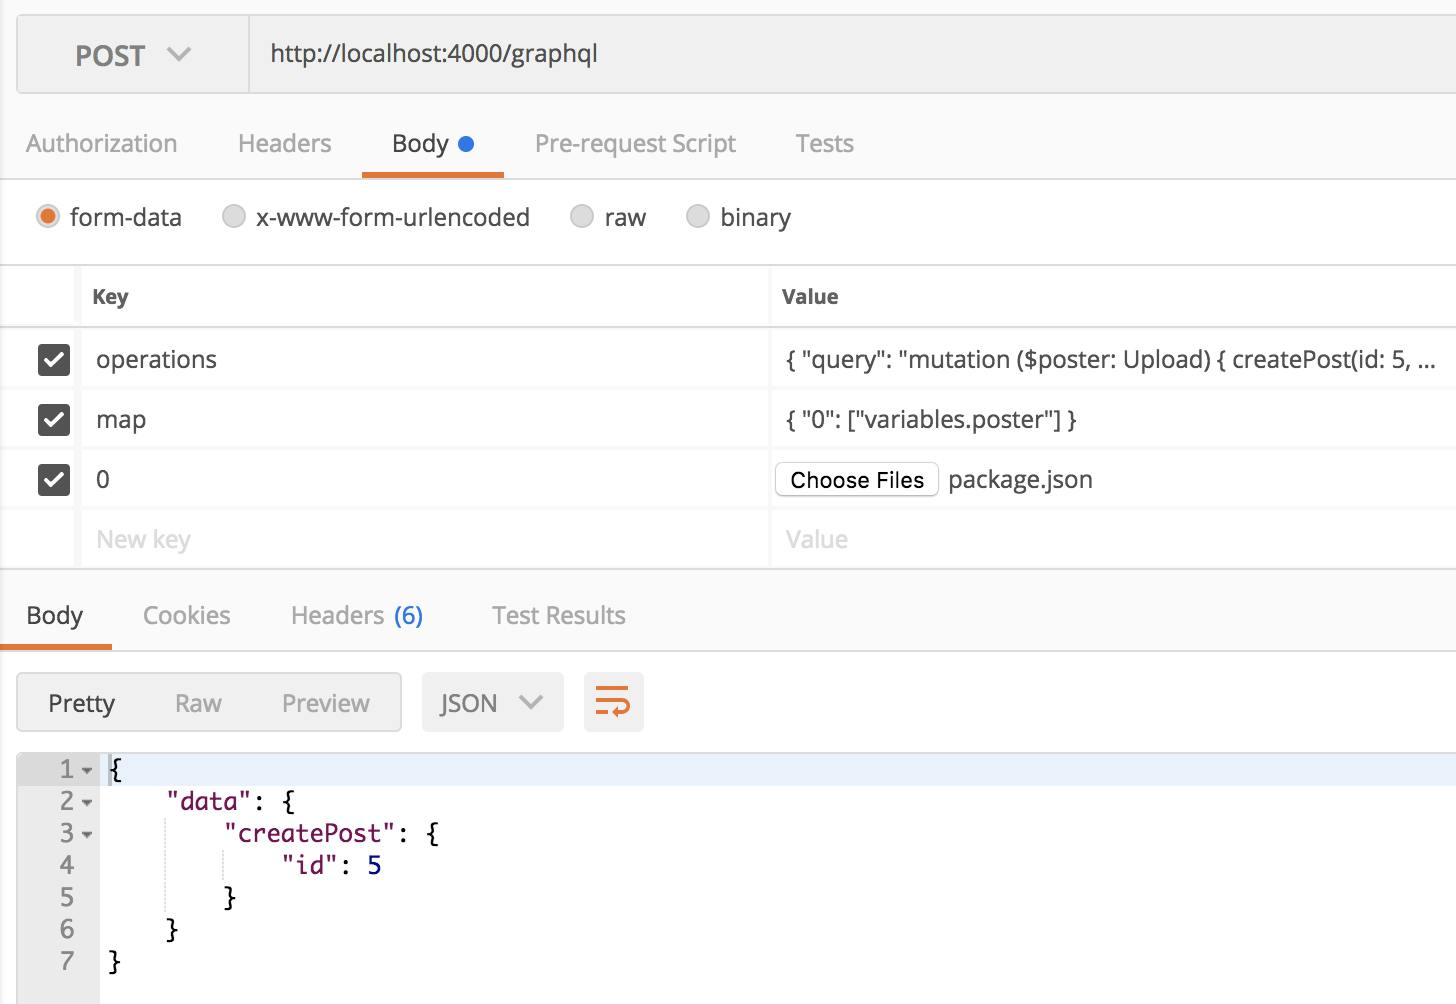 By now you should be able to see the link to the file in the database as a string. To learn more check GraphQL multi-part request .
I hope this helps. Thank you for reading.